

How to Increase Driver Distance: 7 Proven Steps
Table of Contents
- Step 1: Diagnose Your Current Performance With Launch Monitor Data
- Step 2: Optimise Your Driver Shaft Flex and Distance Potential
- Step 3: Perfect Your Tee Height and Ball Position
- Step 4: Improve Driver Launch Angle and Spin Rate
- Step 5: Build Swing Speed With Targeted Golf Swing Speed Drills
- Step 6: Strengthen Your Power and Mobility With Best Golf Exercises for More Distance
- Step 7: Develop a Measurable Practice Plan and Track Progress
- Conclusion
- Frequently Asked Questions
Last Updated: October 11, 2026
Step 1: Diagnose Your Current Performance With Launch Monitor Data
Understanding your baseline is where real distance gains start, and to increase driver distance you need to know what's actually limiting you. Most golfers chase distance without knowing what's actually limiting them. A launch monitor reveals the truth: your clubhead speed, ball speed, launch angle, spin rate, and smash factor all in one session.
Here's what matters. Clubhead speed drives distance potential. Ball speed tells you how efficiently you're transferring energy. Launch angle and spin rate determine trajectory and carry distance. Smash factor (the ratio of ball speed to clubhead speed) shows whether you're hitting the sweet spot consistently or losing energy on off-centre strikes.
Book a session at a local golf facility with launch monitor capability. Bring your current driver and hit 10-15 shots at full intensity. Document every number. This data becomes your roadmap.
What to track from your session:
- Average clubhead speed (mph)
- Average ball speed (mph)
- Smash factor
- Launch angle (degrees)
- Spin rate (rpm)
- Carry distance (yards)
- Dispersion pattern (how much shots vary left to right)
The numbers reveal your specific weakness. Low smash factor means strike quality is the issue. Inconsistent launch angle suggests setup problems. High spin rate with low launch angle points to shaft or swing mechanics. Each problem has a different solution. Without data, you're guessing.
Step 2: Optimise Your Driver Shaft Flex and Distance Potential
The shaft is the engine of your golf club. Not the head. Not the grip. The shaft.
Most golfers stay with stock shafts because switching feels risky. The reality is the opposite. A shaft matched to your swing characteristics unlocks distance you didn't know was there.
Shaft flex matters more than most guides admit. R flex, S flex, and X flex aren't just labels, they're performance profiles that change how your driver loads and delivers energy.

Here's the decision framework:
R Flex suits golfers with moderate swing speeds (80-90 mph clubhead speed). The shaft loads more easily, promoting higher launch and smoother energy transfer. Best for golfers seeking effortless feel and repeatable ball flight.
S Flex targets golfers with athletic swing speeds (90-100 mph). It balances loading ease with control. Most serious amateurs perform best here.
X Flex is for strong players (100+ mph clubhead speed). The firm profile manages launch and spin under load, promoting a penetrating ball flight and tighter dispersion.
Mismatched flex kills distance. Too stiff and you can't load the shaft, losing ball speed. Too soft and the shaft over-loads, creating inconsistent launch and high spin that balloons your shots.
At Prime Golf Shafts, we engineered our graphite shafts with Active Taper Technology to deliver smooth loading and stable delivery across all three profiles.
Step 3: Perfect Your Tee Height and Ball Position
Setup changes deliver distance faster than most golfers expect. Two small adjustments, tee height and ball position, change your launch angle and impact location dramatically.
Tee height directly controls launch angle. Higher tees promote upward strike and higher launch. Lower tees encourage downward strike and lower launch.
If your launch angle sits below 15 degrees, you're losing distance to a trajectory too low. Tee higher (approximately 4-5 cm of tee above ground).
Standard guidance places the ball off your front heel. That's a starting point, not gospel. Your actual sweet spot depends on your swing plane and posture.
Quick test: Hit 5 shots with your current setup. Check the strike location on the clubface. If impacts cluster low on the face, move the ball forward.
Combine tee height and ball position work with your launch monitor data. You're aiming for launch angle in the 15-18 degree range for most conditions.
Step 4: Improve Driver Launch Angle and Spin Rate
Launch angle and spin rate work together. Get both right and distance compounds. Get either wrong and you're fighting physics.
Launch angle is the angle the ball leaves the clubface relative to the ground. Spin rate is how fast the ball rotates. Together they determine trajectory, carry distance, and rollout.
Too low a launch angle and the ball drops quickly, cutting carry distance. Too high and excessive backspin kills distance despite impressive height. Too much spin and the ball balloons. Too little and it dives.
The optimal window depends on your swing speed. Faster swingers (100+ mph) tolerate lower launch angles (14-16 degrees) because ball speed carries the distance.
Spin rate follows similar logic. Faster swingers produce natural higher spin and can tolerate 2,200-2,600 rpm. Moderate swingers perform best at 2,400-2,800 rpm.
Three levers control launch angle and spin:
- Tee height, Higher tees increase launch angle slightly
- Ball position, Forward position increases launch angle
- Attack angle, Upward strike (hitting up on the ball) increases both launch and spin
Most golfers leave distance on the table by hitting down on their driver. Professional players attack the ball with a slight upward strike (2-4 degrees).
How do you hit up? Set up with the ball forward. Maintain your spine angle through impact. Let your lower body lead the downswing.
Step 5: Build Swing Speed With Targeted Golf Swing Speed Drills
Clubhead speed is the primary distance lever, and building it is essential to increase driver distance. Every 1 mph of clubhead speed equals roughly 2-2.5 yards of carry distance.
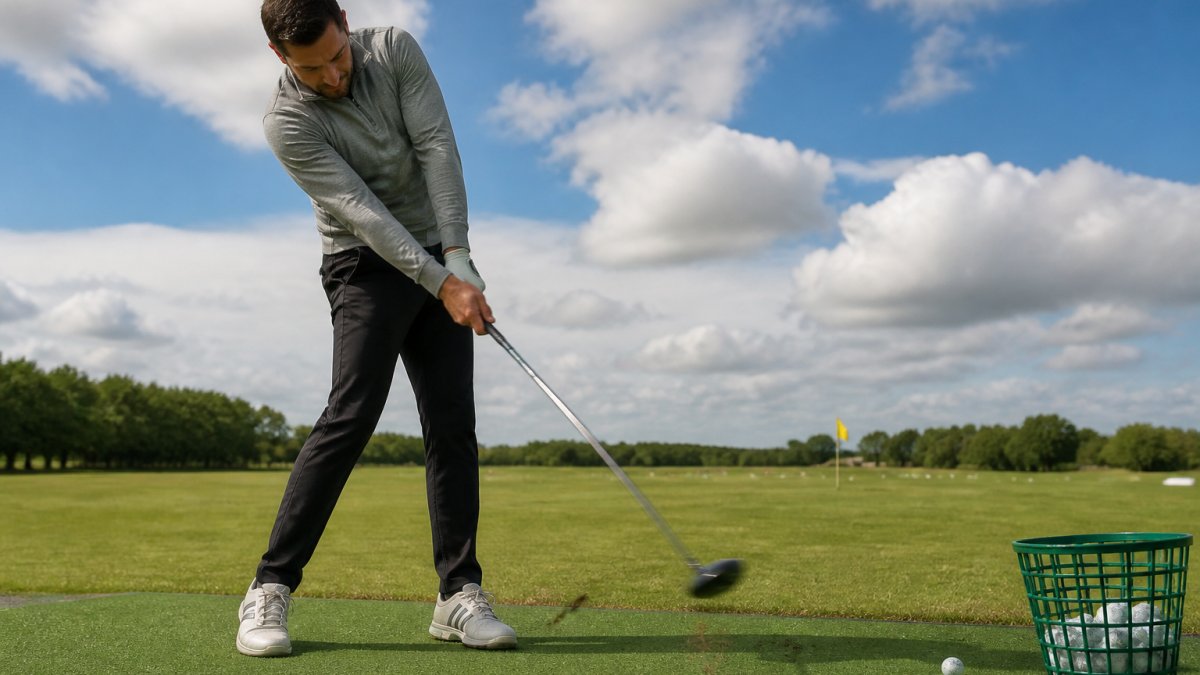
Swing speed drills train your neuromuscular system to generate force faster. They're not random flailing, they're structured movements that build explosive power specific to the golf swing.
Prime Graphite Shaft | X Flex →
The 3-drill sequence for swing speed:
Drill 1: Weighted club swings (5 minutes, 2-3 times weekly) Use a weighted club 10-15% heavier than your driver. Take 20-30 full swings focusing on smooth acceleration through impact.
Drill 2: Tempo swings to full speed (10 minutes, 2-3 times weekly) Hit 5 shots at 50% swing speed. Then 5 at 75%. Then 5 at full speed.
Drill 3: Single-leg balance swings (5 minutes, 2-3 times weekly) Stand on your front leg only and take full swings. This forces your core and glutes to stabilise, building rotational power.
Perform these drills 2-3 times weekly on non-consecutive days. Combine them with the fitness work in the next section for compounding gains.
Step 6: Strengthen Your Power and Mobility With Best Golf Exercises for More Distance
Swing speed comes from your body, not your arms. Building distance requires targeted strength and mobility work that supports an efficient, powerful swing.
The power foundation rests on three areas: lower body drive, core rotation, and shoulder mobility.
Lower body drive generates the energy that transfers up through your core to your arms and club.
Single-leg deadlifts build single-leg stability and glute strength. Stand on one leg.
Core rotation transfers power from your lower body to your upper body. Weak core rotation creates energy leaks, power generated in your legs never reaches the club.
Pallof presses build rotational stability under load. Attach a resistance band to a fixed point at chest height. Stand perpendicular to the anchor point.
Shoulder mobility allows your shoulders to rotate fully, creating the width and lag that generates clubhead speed.
Sleeper stretches open your shoulder joint. Lie on your side with your shoulder at 90 degrees.
Perform these exercises 3-4 times weekly on non-consecutive days. Combine them with swing speed drills for synergistic gains.
| Exercise | Sets | Reps | Frequency |
|---|---|---|---|
| Single-leg deadlifts | 3 | 8-10 per leg | 2-3x weekly |
| Pallof presses | 3 | 10-12 per side | 2-3x weekly |
| Sleeper stretches | 3 | 30 seconds | Daily |
Step 7: Develop a Measurable Practice Plan and Track Progress
Distance gains require consistency and measurement. A practice plan without tracking is just hope.
Structure your practice around the levers you've identified. If launch monitor data showed low smash factor, prioritise strike quality work.
Your weekly practice structure:
Monday and Thursday: Swing speed drills (15 minutes) + fitness work (20 minutes). Hit 20 balls focusing on tempo and acceleration.
Tuesday and Friday: Setup and launch angle work (15 minutes). Hit 30 balls concentrating on tee height, ball position, and attack angle. Use launch monitor data to guide adjustments.
Wednesday: Fitness work only (30 minutes). No golf swing work. Recovery and adaptation happen on rest days.
Saturday or Sunday: Range session (45 minutes). Hit 50 balls with focus on consistency. Alternate between swing speed emphasis and strike quality emphasis week to week.
Return to launch monitor testing every 4-6 weeks. Compare your numbers to the baseline. Track:
- Clubhead speed trend
- Ball speed trend
- Smash factor trend
- Launch angle consistency
- Dispersion pattern (tighter is better)
Real distance gains show up as higher clubhead speed, improved smash factor, or better launch angle consistency. One or more of these metrics will improve if you're executing the plan correctly.
If progress stalls, return to Step 1. Diagnose what's limiting you now. Your limiting factor may have changed. Address the new constraint.
Conclusion
Distance gains come from diagnosis, not guesswork. Start with launch monitor data. Identify your specific limiting factor, whether it's shaft fit, setup, launch conditions, swing speed, or strike quality. Build a focused practice plan around that constraint. Track progress with measurable checkpoints.
At Prime Golf Shafts, we've worked with golfers at every level pursuing distance gains. The pattern is consistent: golfers who combine equipment optimisation with targeted swing and fitness work see the biggest improvements. Our graphite shafts with Active Taper Technology are engineered to support this process. They deliver stable, efficient energy transfer across all three flex profiles (R, S, and X), giving you the shaft foundation to build on.
Get started with Prime Golf Shafts and unlock the distance that's already in your swing. Visit our site to explore custom shaft options matched to your swing characteristics.
Frequently Asked Questions
How much distance can I realistically gain by increasing driver distance?
Distance gains depend on your starting point and which factors you address. Golfers who improve ball strike consistency and launch conditions typically gain 10-20 metres. Swing speed increases of 5-10 mph can add 15-25 metres of carry distance. Equipment changes like shaft flex matching can unlock 5-15 metres if your current setup is misaligned with your swing characteristics. Real gains come from combining multiple improvements: better strike quality, optimised launch conditions, and increased clubhead speed.
Does driver shaft flex really affect distance?
Yes. Shaft flex directly affects how the shaft loads and unloads through the swing, which controls launch angle, spin rate, and energy transfer. An R Flex shaft promotes higher launch and is suited to golfers with moderate swing speeds; an S Flex delivers controlled launch and tighter dispersion for mid-range swing speeds; an X Flex provides stability and a penetrating ball flight for higher swing speeds. Mismatched flex causes inconsistent contact, poor launch conditions, and lost distance. Custom-fit shafts engineered with Active Taper Technology ensure smooth loading and stable delivery through impact, maximising efficiency for your specific swing.
What's the difference between carry distance and total distance?
Carry distance is how far the ball travels through the air from strike to landing. Total distance includes carry plus rollout (how far the ball bounces and rolls after landing). On a firm fairway, rollout can add 5-15 metres. Optimising launch angle and spin rate improves carry distance; course conditions and ball choice affect rollout. For most golfers, increasing carry distance is the primary focus, but understanding both metrics helps you evaluate whether equipment or technique changes are actually working.
Do I need a professional fitting before buying a custom shaft?
A professional fitting with launch monitor data is the most reliable way to identify your swing characteristics and match them to the right shaft profile. However, if you know your swing speed, launch angle preference, and ball flight tendency, you can select a shaft based on those specs. Prime Golf Shafts offers three performance profiles, R, S, and X Flex, each engineered with Active Taper Technology to match different swing speeds and playing styles. If you're unsure, a fitting removes guesswork and ensures your investment delivers real performance gains.